
The snappy web interface for your 3D printer.
Full remote control & monitoring
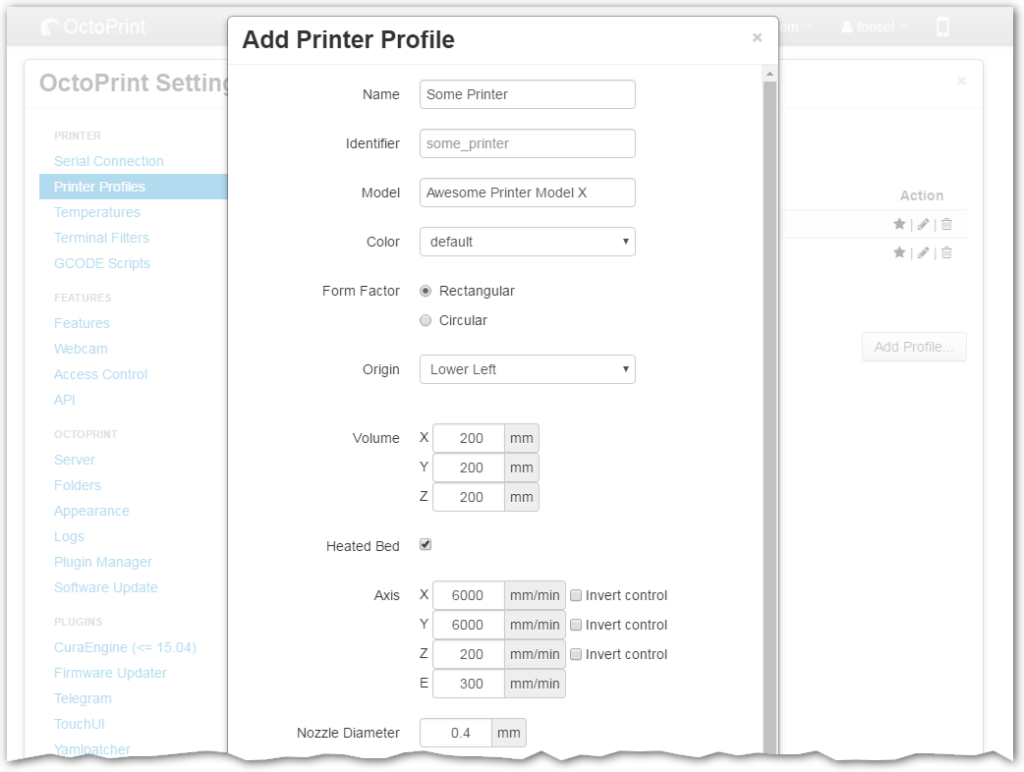
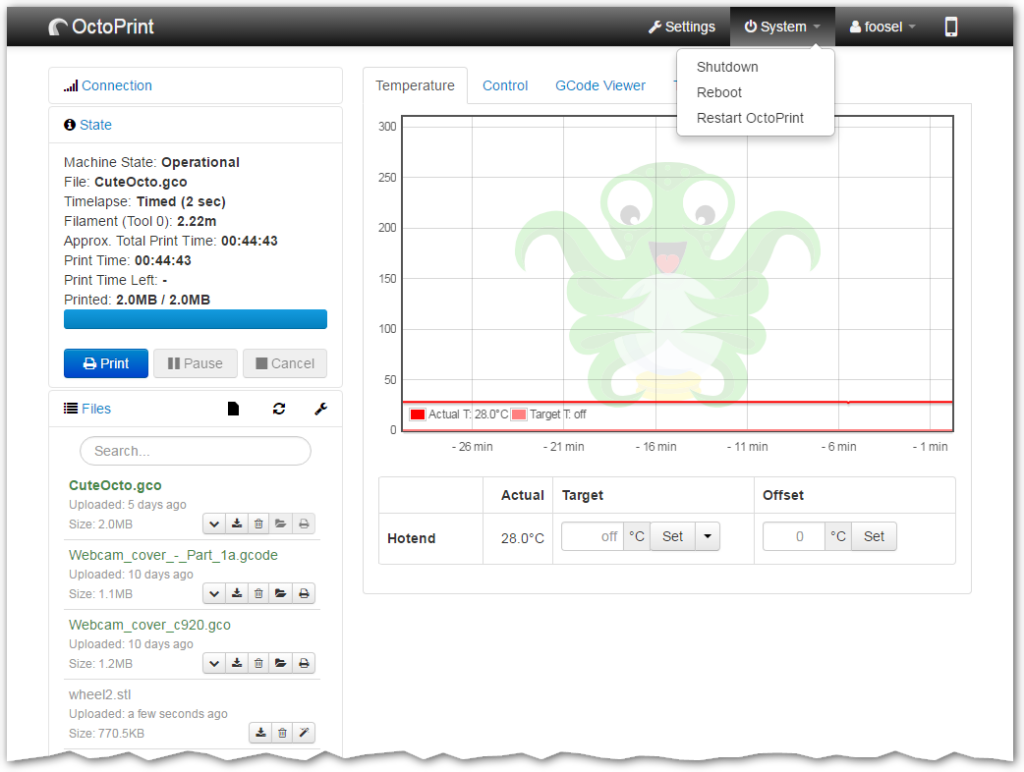
Control and monitor every aspect of your 3D printer and your printing jobs right from within your browser:
- Access the embedded webcam feed and watch remotely how your printer is creating your newest thing.
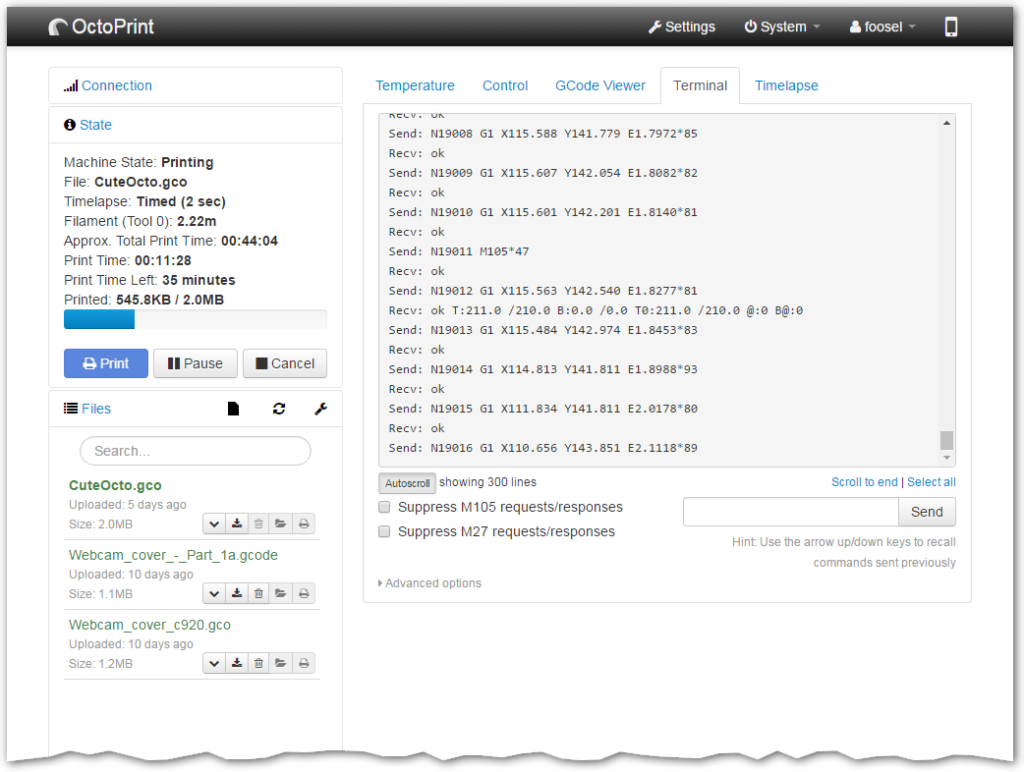
- Get constant feedback regarding the current progress of your print job.
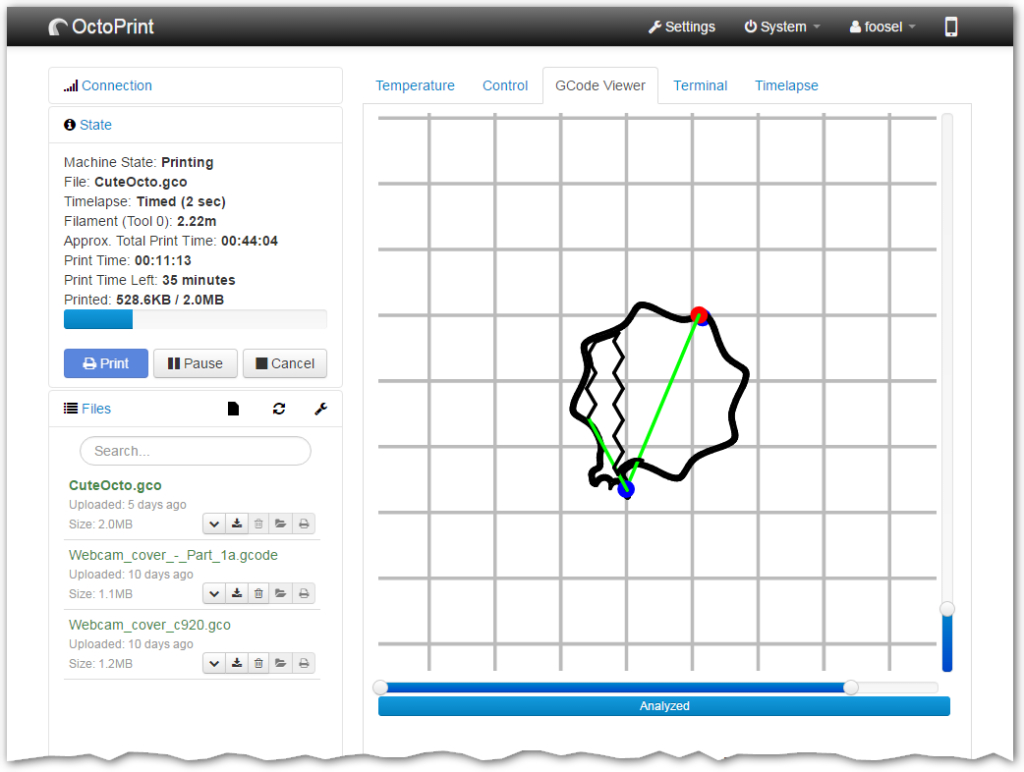
- Take a look at the integrated GCODE visualizer to see a rendition of the GCODE you are currently printing.
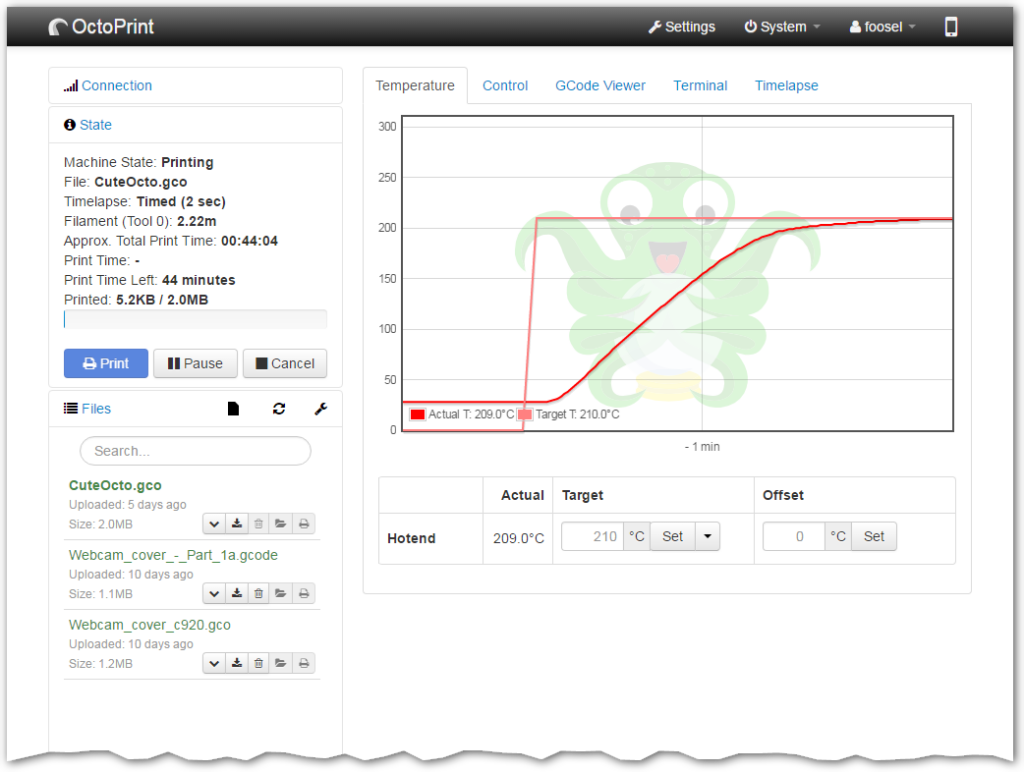
- Keep an eye on the temperatures of your hotends and print bed and adapt them on the fly.
- Move the print head along all axes, extrude, retract or just define your own custom controls.
- Start, stop or just pause your current print job, you are in full control at any time.
Compatible and extendable
Out of the box OctoPrint is compatible with most of the available consumer 3D printers. And its powerful plugin system allows extending its functionality in various ways. To name a few:
- Visualize your bed leveling via Bed Level Visualizer.
- Create stunning timelapses that seem to just grow out of the print bed using Octolapse.
- Completely control the themeing of OctoPrint’s UI with Themeify.
- Easily update your printer’s firmware right from within OctoPrint via Firmware Updater.
- Add support for specific printers like older Flashforge printers or older Makerbots or current Flashforge, Dremel or PowerSpec machines.
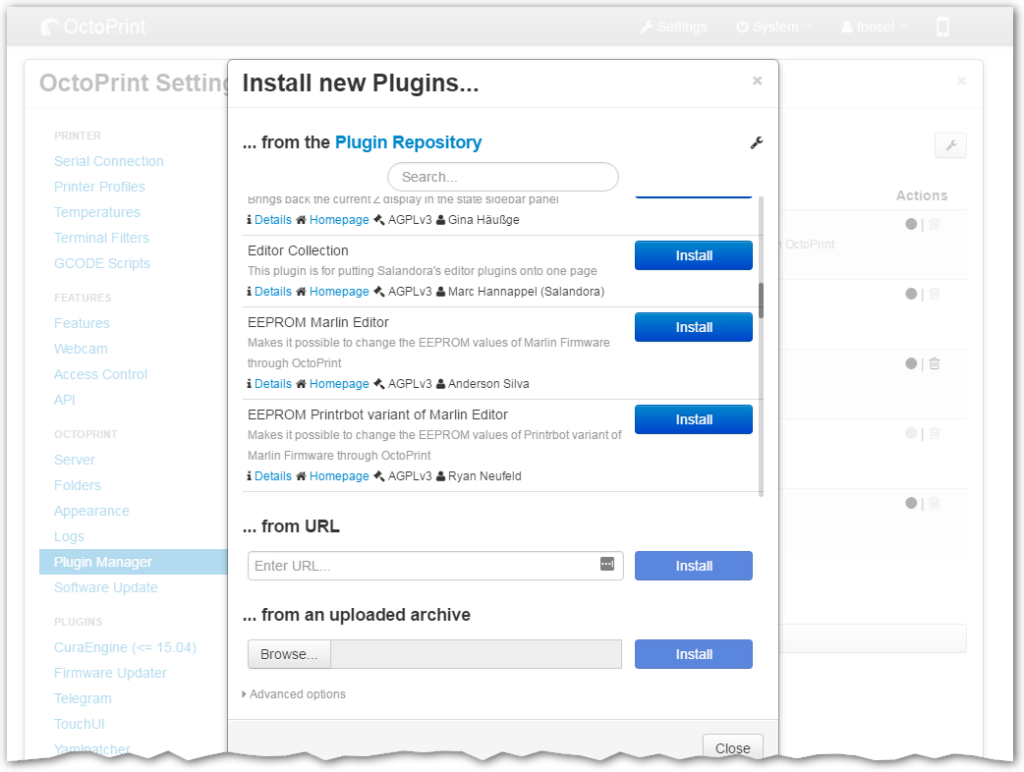
OctoPrint’s official plugin repository is integrated right within OctoPrint and installing a plugin is only a click away. And getting started on plugin development is easy!
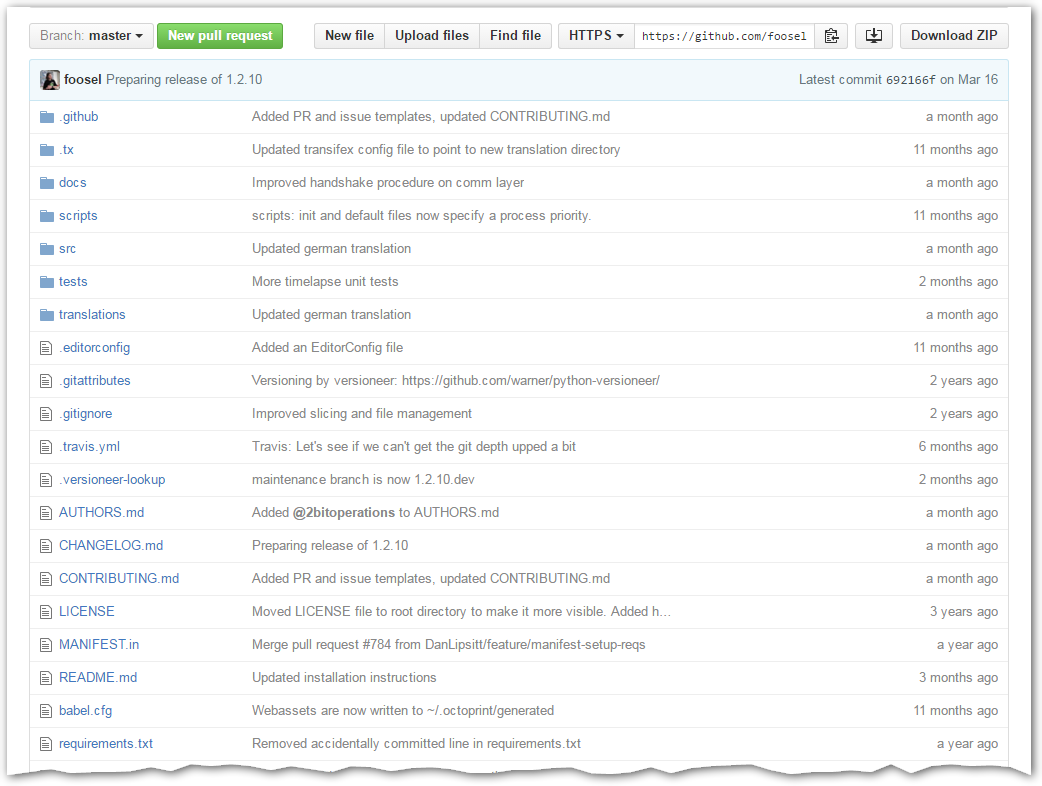
100% Open Source
OctoPrint is Free and Open Source Software released under the GNU Affero General Public License (AGPL).
All its source code is available in its Github repository and everyone can modify it to their own needs.
And even more!
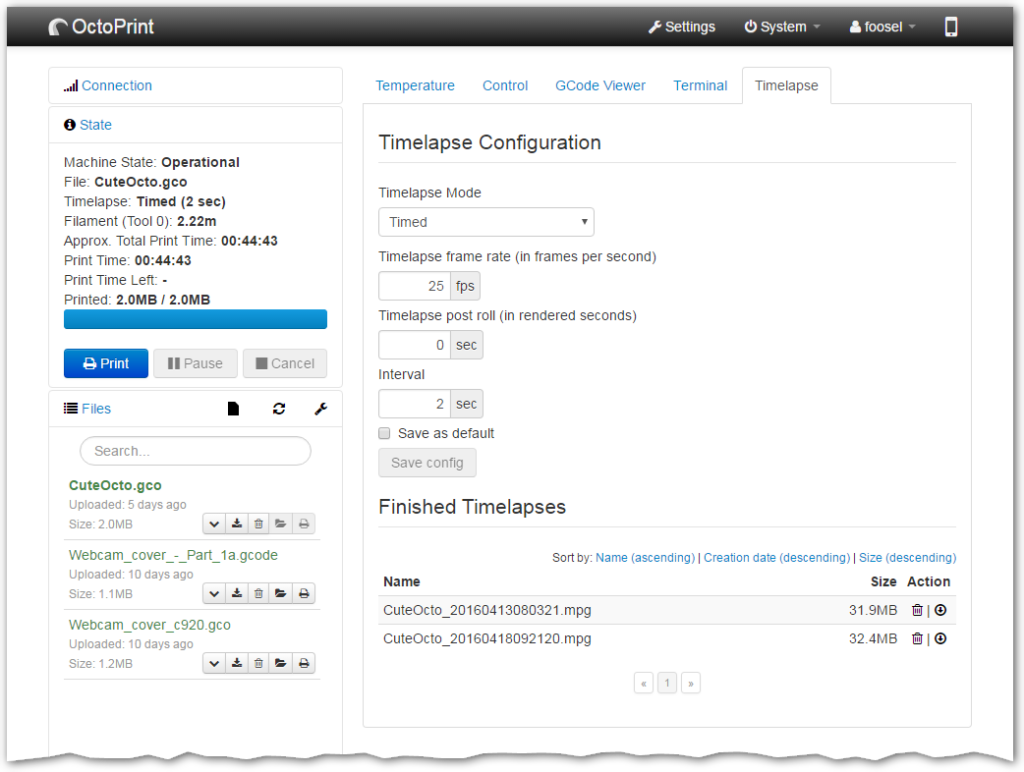
- Create awesome timelapse recordings of your prints!
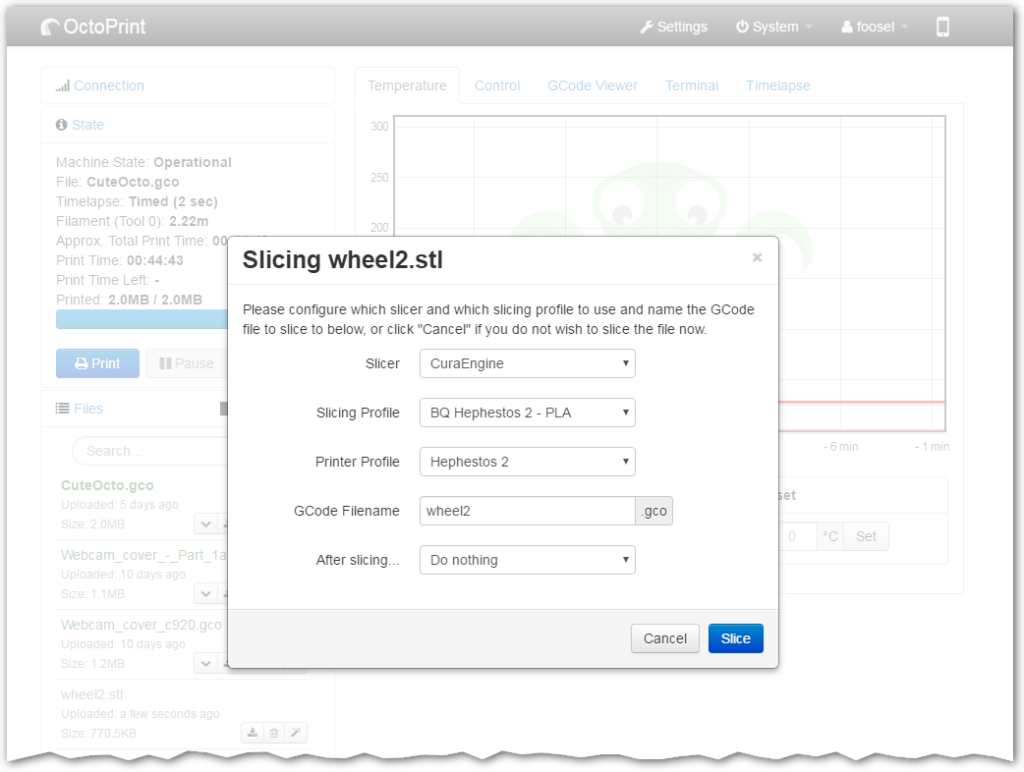
- Slice your STL files directly within OctoPrint.
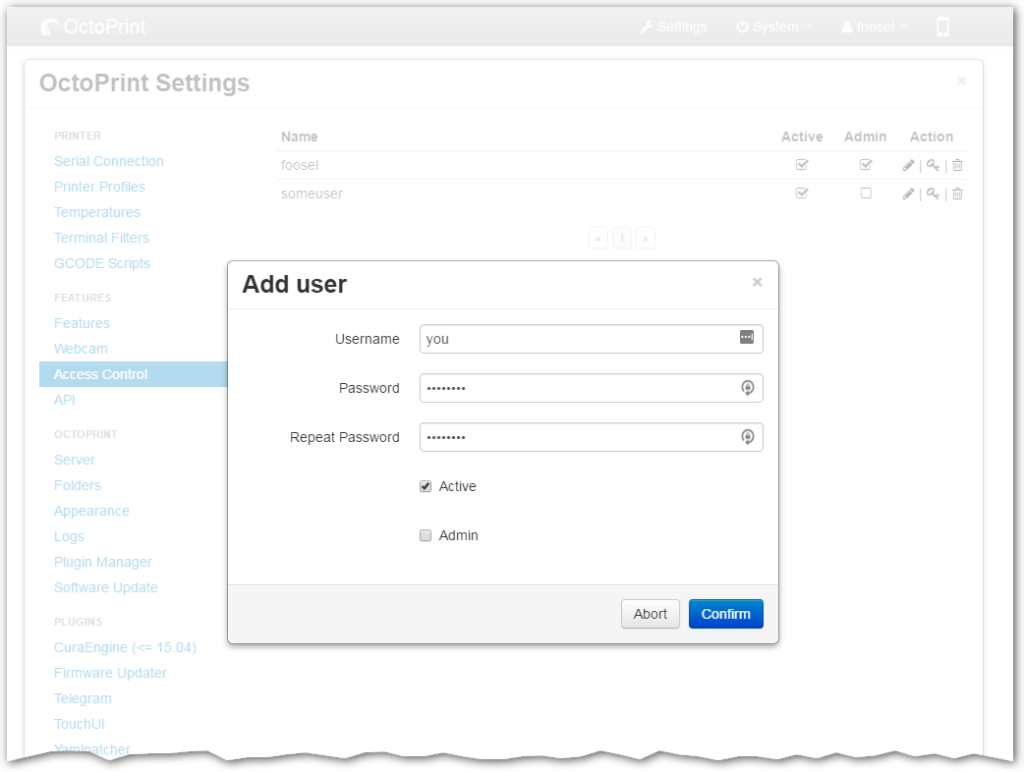
- Control who can control your printer with the built-in access controls.
- Add system commands to the menu to easily shutdown or reboot your OctoPrint server or even your printer.
- Configure event hooks to react to certain events within OctoPrint by calling external commands or sending custom GCODE to your printer.
- and so much more…

OctoPi
Guy Sheffer maintains “OctoPi”, a Raspbian (and thus Debian) based SD card image for the Raspberry Pi that already includes OctoPrint plus everything you need to run it:
- OctoPrint plus its dependencies
- MJPG-Streamer for live viewing of prints and timelapse video creation, compatible with various USB webcams and the Raspberry Pi camera
Recommended hardware: Raspberry Pi 3B, 3B+ or 4B. Expect print artifacts and long loading times with other options, especially when adding a webcam or installing third party plugins. Setups not using recommended hardware are not officially supported.
Please note that the Raspberry Pi Zero W is not recommended explicitly since severe performance issues were observed, caused by the WiFi interface when bandwidth is utilized (e.g. the webcam is streamed), negatively impacting printing quality. See also here.
You can download the latest OctoPi image via the following button. Download OctoPi 0.17.0MD5Sum of the .zip: 8a550602b8ccc5df8381924757f88ab9
Raspberry Pi 3B, 3B+ or 4B 1/2/4GB strongly recommended, Raspberry Pi Zero/Zero W not recommended at all!
Image compatible with Raspberry Pi A, B, A+, B+, 2B, 3A+, 3B, 3B+, 4B 1/2/4GB, Zero and Zero W.
Unknown compatibility to Raspberry Pi 4B 8GB. Only 32bit builds available.
or simply buy one of the availableAll-in-one OctoPrint Kits
Setting up OctoPi
Please follow these steps after downloading:
- Unzip the image and install the contained
.imgfile to an SD card using Etcher. Do not at any point format the SD from your Operating System, even if prompted to do so – that will break it and you’ll have to start over. Just use Etcher to flash the.imgfile, that is enough! - Configure your WiFi connection by editing
octopi-wpa-supplicant.txton the root of the flashed card when using it like a thumb drive. Important: Do not use WordPad (Windows) or TextEdit (MacOS X) for this, those editors are known to mangle the file, making configuration fail. Use something like Notepad++, Atom or VSCode instead or at the very least heed the warnings in the file.Note: This changed with OctoPi 0.15.0, earlier versions had you editoctopi-network.txtwhich has a different format. This old method is no longer supported and the contents of this file will be ignored. Just useoctopi-wpa-supplicant.txt.Please also refer take a look at the full WiFi setup guide in the FAQ that also includes Troubleshooting tips. - Boot the Pi from the card.
- Log into your Pi via SSH (it is located at
octopi.localif your computer supports bonjour or the IP address assigned by your router), default username is “pi”, default password is “raspberry”. Runsudo raspi-config. Once that is open:- Change the password via “Change User Password”
- Optionally: Change the configured timezone via “Localization Options” > “Timezone”.
- Optionally: Change the hostname via “Network Options” > “Hostname”. Your OctoPi instance will then no longer be reachable under
octopi.localbut rather the hostname you chose postfixed with.local, so keep that in mind.
- Access OctoPrint through
http://octopi.localorhttp://<your pi's ip address>. https is available too, with a self-signed certificate (which means your browser will warn you about it being invalid).
Please also refer to OctoPi’s README, especially the “How to use it” section.